Everyone has a story to tell, here's mine sprinkled with some creative projects along the way. Thank you for stopping by and I hope you come back again.
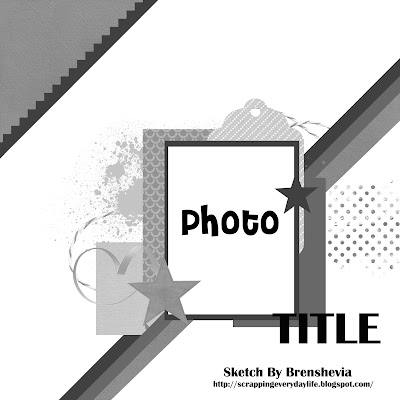
Hi there dear friends. Today's layout was based off the February week 1 sketch from Let's Get Sketchy blog.
I love the angles on the sketch and decided to use my latest homemade kit inspired by the Counterfeit kit blog challenge for this month. I normally work on straight angles so this was fun and out of my comfort zone.
I used a combination of pretty old and new to me products here. I love how the color scheme makes everything blend together well. I purposely blurred the photos of the children in the photo in order to protect their privacy.
I just love this scallop trim that I scored at the dollar spot at Target. It's so fun and shiny.
I hand cut the flowers from pattern paper and I love how it instantly gives my page the feminine touch without costing too much money.
So there you have it. Thank you again for stopping by.
Happy Tuesday dear friends. I hope that your week is off to a great start and that you are finding time to be creative. The following layout was inspired by this sketch from the Stuck?! blog.
For this page, I decided to document some "last of day of school" photos of my son. This was for his last day of 3rd grad and it's long overdue (he's in 7th grade now). I loved how the sketch provided for more than one photo and I actually "snuck" in a fourth one which represented the mass of kids happy to be leaving school for their summer vacation. I purposely blurred some of the photos in order to keep the identity of the children private.
I used another homemade kit for this layout. It was actually inspired by the latest kit inspiration from the Counterfeit kit challenge blog. I recently came across them and love the kit inspiration that I decided to play along. I'm hoping to create a video of my kit sometime soon. Make sure to check out my YouTube channel on the right side of this blog for more information.
This layout has increased in meaning for me over the last week after hearing of my son's teacher (in this photo) that recently passed away due to cancer. I am grateful for her and her devotion to her students over the years, my son being one of them. It's amazing how much value we put in our photos, especially when those in it are gone. I am now contemplating of creating a better system of printing my photos so that I don't ever lose any of my precious images. Do you have any suggestions?
Thank you so much for stopping by and I hope you have a great day.
Happy Monday friends. Today I'm sharing my finished December 2015 memories album. I am also going to share with you some of the things that I've learned along the way.
I actually put together a few videos regarding this album. If you wanna watch it, just click play on the following video....
To see what I had put in my Dec. Daily album kit...
What my album looked like at the end of December...
A visual share of my album after it was all done...
If you didn't watch the last one and want to know the lessons I've learned along the way, they are the following...
1. Don't add the word "daily" to my album. Because I didn't add any wiggle room for possible failure in the daily photo taking part of this project, I set myself up for failure because I had the word "daily" in my album title. I don't want to do that again next time, in case I am not successful in capturing every single day of my month.
2. Write the journaling part of the pages on a scrap paper. After I have finished all of my pages, I sat down and just started jotting down my feelings/memories about each day/page. This helped me iron out my words and eliminate any typos or mistakes on my journaling. Plus it helped make the typing or writing part of the journaling fast, because my words were already there.
3. After finishing the book, instead of separating all of the items back into their regular places (ie papers in paper stacks, stickers in their respective containers, etc) I combined them all in one bag and labeled it Christmas products. This way, they were all together and every time I need to make a project that has this holiday theme, everything is in one bag/spot.
Additional lessons...
1. Don't stress if you don't get it done in the month of December. I feel that there are far more important things to worry about than getting an album done by December 31st. It has helped me be "present" during this special time of the year.
2. Fill in the pages of your album with memorabilia like wishlist. Just create a pocket or envelope to hold the ephemera.
Here are some more close ups of my album and the inside...
Thank you so much for stopping by. I hope this share gave you some ideas for your next mini album project.
Hello friends. Today I'm sharing my February take on the Stick it Down two page spread sketch challenge. Here's the sketch inspiration....
And here's my take on it....
I liked the photo placement and also the layering in the back but I had these smaller photos from a bike ride that my family and I did in 2013 that needed to be scrapped. I still did the layering on the back of the image clusters but moved my title on the bottom (smaller) cluster and added my journaling on the top right side of the page. I used some frames, cut out from paper for my embellishments and also my title holder.
Here are some more close ups...
Thank you for stopping by and make sure you check out the rest of the team's inspirations at the blog today.
My photos were much larger than the sketch so I had to be very minimal with the rest of the elements in the page. I was still using my homemade scrapbook kit for January for this layout.
Do you wanna see what I had put into my kit? Here's a video if you want to take a peek...
And here are some more close ups....
The sketch showed a chevron type of background. I really wanted to stretch my kit and I didn't have any more full sized sheet paper when I did this page. So to maximize my kit, I used the stencil and created my own triangle design using some modeling paste and yellow acrylic paints. I figured that the yellow can be a good coordinating color for the pink cardstock as well as for the purple jacket that my daughter was wearing in the photos.
Thank you for stopping by. I hope you have a great start to your week.
Happy Friday. Today's layout share was inspired by the latest challenge over at Kraft Plus challenge blog.
I used a "Postage stamp" stamp set and I embossed it onto the Kraft cardstock background using some gold embossing powder. I thought it gave a subtle design to my background without competing with the foreground design.
I had a bunch of pictures for this page, and they were quiet big so I had to be very minimal with my embellishments. My title block worked double duty housing my title and a little bit of journaling.
Hi guys. My kids are going to have a four day weekend coming up so I'm working hard in getting my finished layouts up on the blog today and tomorrow before I "play" with the kiddos. What's your plan for the long weekend?
Instead of using a Polaroid frame on the left side, I pulled out some tag die cuts from Avery Elle to add to my homemade kit. I busted that out and made a vertical row of tags using some papers from the Cedar Lane collection from Pink Paislee. I inked the edges to make them stand out from the background papers a bit more.
And for the frame, I had some chipboard frames, also from Pink Paislee, that I added on this page. I used one to house my journaling and the other for my title.
Because my page was pretty busy with lots o f pattern papers, I matted my photo with dark green paper to make it stand out against all the background.
Here are some more close ups....
Thank you for stopping by and I hope you have a creative weekend.
I had way more than one photo to remember an anniversary date that I had with hubby two years ago so my photo pretty much took over the center of my page. I did manage to use the layered papers as shown in the sketch. I tried to add hearts to the top and bottom and uses some enamel hearts instead of the larger one on the sketch.
Since this is an anniversary date, I sprinkled lots of "love" and hearts on this page to emphasize the theme. I also used some pinks and red to help bring out the "love" part of my page.