Everyone has a story to tell, here's mine sprinkled with some creative projects along the way.
Thank you for stopping by and I hope you come back again.


Friday, March 27, 2015

The Hunt layout + process video

Hi guys. It's been spring break for my kids and I almost forgot to post this today. It's my fifth layout with my homemade scrapbook kit for March. I can't believe these pictures are from 2 years ago. 


Here's a process video to go along with this share...

and a few more detail shots....


Thanks for stopping by. I hope you have a fantastic weekend.

Till next time,
Grace

Wednesday, March 25, 2015

Celebrate layout + Process Video

Happy hump day everyone. Today I'm sharing my fourth layout from my homemade scrapbook kit. If you wanna see what I had put in that kit, please check out this blog post

You know how I'm addicted to challenges and I recently discovered the Kraft Plus challenge blog. They had a great sketch this month and here's what I made with that inspiration...

I was drawn to the fun elements in the sketch and wanted to raid my "kraft cardstock" stash. The only thing I was not able to incorporate is something shiny or with gold accents. I wanted to use up my homemade kit supplies and decided that that's enough for this layout.

Here's a process video to go along with my layout share...

And here are some more close ups...


Thank you for stopping by and I hope you continue to have a great week.

Till next time,
Grace

Monday, March 23, 2015

My Favorite Things layout *Stick It Down GDT post*

Last month, I submitted one of my layouts for the sketch challenge over at Stick It Down. I was fortunate to win among the great entries and part of that win is to be invited as a guest designer. The wonderful ladies over that challenge blog gave me this sketch to use...

and here's my take on it....
One of my purchases last month was a paper collection from My Mind's Eye called "Now and Then" and I used that in this layout. The pictures are of my daughter when she turned 7 years old (which was close to 3 years ago). I wanted the soft colors of the paper and the bold hues of her clothes in the picture to stand out so I used a grey cardstock as my base. I added some craft flowers in three different places on the layout and sprinkled some Mr. Huey white mist to add more interest.

I enjoyed playing along with this sketch and here are some more close ups...


Thank you for stopping by and make sure you check out the latest sketches over Stick It Down here.

Till next time,
Grace

Friday, March 20, 2015

Bike Ride layout + Process Video

Hi there my dear crafty friends. Today is the official start of my kids' Spring break. That means that they will be home while I'm trying to do homework (I am taking online classes) and my scrappy pursuits. It will be interesting to see how much I get done. 

So before all the "craziness" starts, let me share with you the third layout I made with my homemade scrapbook kit for the month. 

This layout was also inspired the latest "stash" challenge over at Scrap our Stash. The theme of the challenge is to use items from our stash that corresponds to each letter of the word STENCIL. Here are my list:

S- Sewing
T- Twine
E- Elle Studio label and circle accents
N- Numbers (on the calendar)
C- Circles created by a mask and modeling paste
I- Ink from a mist and inked edges for my library card tag
L- Library card that housed my title

And here's a process video to go along with the layout...

and here are some close ups...


Thank you for stopping by and I hope you come back again soon.

Till next time,
Grace

Wednesday, March 18, 2015

Tip tutorial video: How to make your own homemade embellishments

Hi there dear friends. Today  I'm sharing a tip video with you. I have been trying to put my supplies to good use lately and I found that if I make my own embellishments, I'm able to stretch my stash a bit more. 
I hope my ideas inspired you to create your own embellishments and accents. 

I also wanna know what's your tip for making homemade accents? I might just try it out. 

Thanks for stopping by. 

Till next time,
Grace

Monday, March 16, 2015

Friday, March 13, 2015

I Like Totally Love You layout + Process video

Happy Friday dear friends. 

I am feeling a bit more positive lately cause we've had some sunshine around here. I gotta tell you, I love looking at the pristine white snow, but only for a little bit. With all of the snow days that we've had in February, I was definitely ready for some sunshine. 

Here's a layout that fits the bill. Yellow background for the sunshiny effect and lots of color that welcomes the spring season in style...

I created this layout with my March "bunny hop" kit and used the latest challenge in the Studio challenge blog which is a recipe challenge.

The list included:
Mist-misted the background and paper flowers
Stamping- my title and a little note on the bottom were stamped
Sequins- star sequins scattered around
Chipboard- the monogram "m" is a chipboard sticker
Brads or Eyelets- added a brad in one of the centers of the flower
Thread- Added twine through two buttons
vellum- Typed my journaling on vellum
yellow- yellow cardstock for my background


Press play here to watch my layout from start to finish...

and here are some more close ups...


Thank you for stopping by and I hope you have a fantastic weekend.

Till next time,
Grace

Wednesday, March 11, 2015

Bunny Hop kit *Homemade Scrapbook kit*

Hello there my crafty friends. Today I'm sharing with you, through a video, my March homemade scrapbook kit. I gotta tell you, I'm really liking this concept of putting kits together from your stash. It has helped me put together items that I might not have otherwise done so and I have tried to color combinations that are outside of my comfort zone. This month's kit is based off of this color scheme...

Watch the video to see what I have gathered up for my "bunny hop" kit...

I am super excited to get going with this kit. Not only does the colors scream Spring, which I am dying to come soon, but it will also allow me to try techniques such as misting, using a stencil and paper layering. These are some of the ways that I've seen people use to make their pages shine and I'm all about learning this year so I hope to put my own spin on this trendy techniques.

I hope that you will be able to join me this month as I share what I've created with my kit and if you have the desire, put together your own kit and see how that takes your creating into a whole new level.

Happy creating!

Till next time,
Grace

Monday, March 9, 2015

Book Review- The Wedding Dress

Hi there friends. This month's book that I am reviewing is a novel from Rachel Hauck. I picked this up from my library in February. On a side note, I got this book in the large print version and my husband commented that he will be able to read this book without his glasses. I told him that I like reading large print books nowadays because of that same issue. I guess I'm just getting old. Ha!


I liked the premise of a wedding dress worn by four different women in a span of 100 years. I never liked period pieces but with this one which bounced from the "now" to back then kept my interest. I also really liked how clean the book was. It didn't have any foul language or scenes/parts that are too slutty (I don't know how else to describe it?)

Over all I was very pleased with this read. It was light and sweet. Perfect break from all of my school readings.

Thanks for stopping by and I hope you come back here again soon.

Till next time,
Grace

Friday, March 6, 2015

Pin To Done- Burlap Wreath

Hi there crafty friends and happy Friday. Today I'm sharing with you this month's "pin to done" project that I was able to finally check off of my long Pinterest list.

I have made wreaths before but because they are always seasonal, there's not one of them that I can just place in the front of my door and leave it there till I remember to change it out. For this reason, I decided to create one from burlap. I had watched some videos and looked at Pinterest for ideas and the two that I got my inspiration from is from here and here.

I was so happy to score a straw wreath at Goodwill in December and also a burlap trim pack from Tuesday Morning on sale. I also got the pins from Tuesday morning. 

I followed the tutorial on how to fold the burlap. My trim wasn't quite 4" so I made my squares 3 inches instead. Because my squares were smaller, it required for me to fill the front more and so if you look closely, I wasn't able to cover the sides very well. That doesn't bother me much though as I think some of the straw wreath showing up blends with the color of the burlap. 

I added a bow with leftover trim on the top and added an orange silk ribbon for a pop of color. I had some tiny banner stickers from my scrapbook stash that I hot glued to a piece of twine and strung it on the top of the wreath as well. 

Here are some more close ups...


Thank you for stopping by and I hope this inspired you to create a wreath or home decor to brighten up your home.

You can visit my Pinterest page with wreath ideas for more inspiration.

Till next time,
Grace

Wednesday, March 4, 2015

Other layouts with my homemade February scrapbook kit

It's me again, sharing with you two more layouts that I created with my February homemade scrapbook kit. I'm in the process of putting together my March one and I can't wait to share it with you.

These layouts didn't come with a process video. I am finding that I work on my layouts as time permits and that means that it's harder to work when I still have to set up the camera and clean my surface. I'm hoping to find a better system so I can continually share process videos as I make my pages. 

Happy Times with the Family
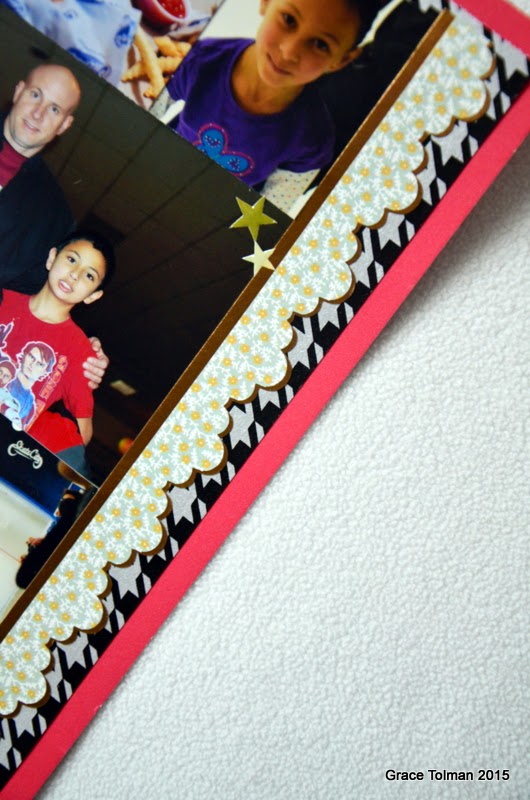
This layout was about our roller skating activity that we did in 2012. I had a long title because I wanted to use up some of the stickers that I pulled out for the kit.

I heat embossed that handmade ribbon accent with gold powder then added some red silk ribbons on the bottom. I used the grid paper from Teresa Collins for my journaling. I liked that it gave me clean lines to add my handwriting to. 

I did a lot of layering of papers here as I was going through scraps from my kit. I wanted to incorporate every little bit that I can.

This trim was from the SEI sticker sheet and it complemented the two circles with gold embossed stamping on them.

I added some "love" rubons on white cardstock and then added the word "merry" with a sticker over it
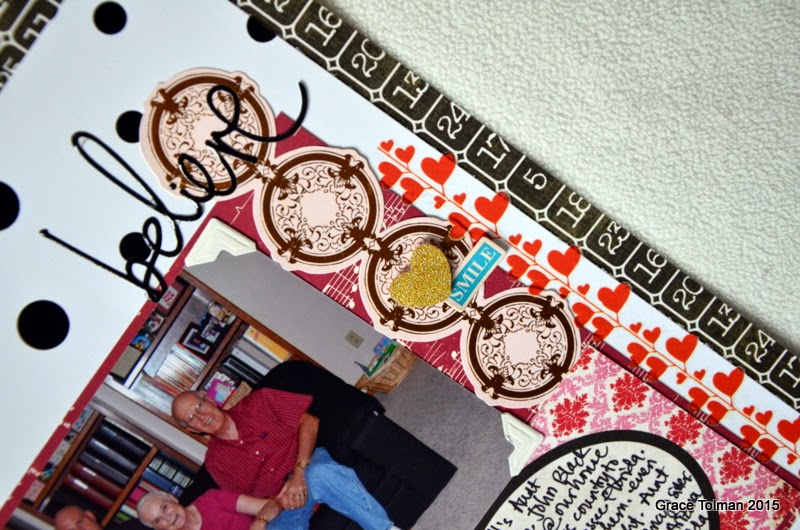
Where there is Love
This layout is about a quick overnight visit of my husband's aunt and her husband in 2011. They were traveling across the country from Arizona to Florida for an LDS mission. It was nice to visit with them even if it's just for a little while. 

This was my last layout with the kit so I was putting together lots of bits and leftovers. That title is from Creative Memories and I dressed it up a bit with some red photo corner stickers from GCD Studios. I adhered it with some foam adhesive so I can tuck some other stickers and embellishments under it.

This spot is a layering of all sorts of stickers and I punched out a heart from the gold glitter paper to add some gold detail to this area of the layout. I also added a row of heart rubons.

I used a die cut border from GCD Studios and threaded that with a skinny gold trim.

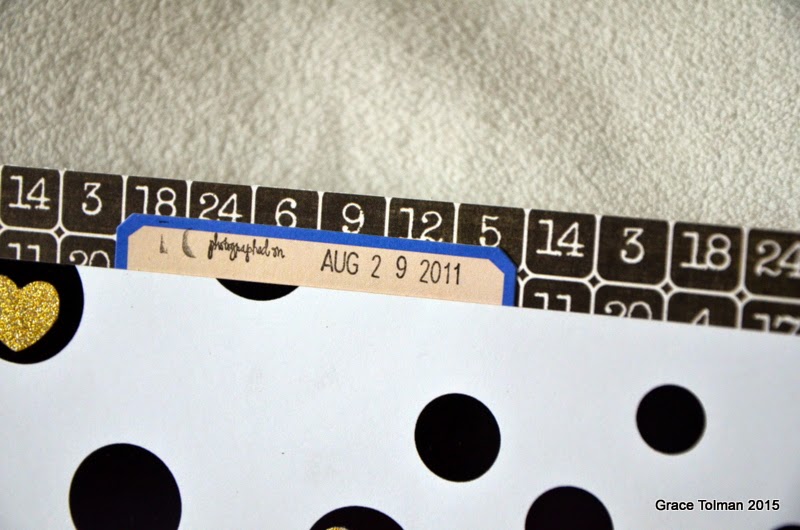
I can't leave this layout without adding the date. I decided to do that with my Studio Calico date stamp.

So there you have it. Thanks again for stopping by and if you have any questions, please don't hesitate to leave me a comment below.

Till next time,
Grace