Everyone has a story to tell, here's mine sprinkled with some creative projects along the way.
Thank you for stopping by and I hope you come back again.


Friday, December 28, 2012

My favorite projects from this year

Let me start of by saying that I LOVE all of the projects I made this year. They are an extension of who I am. If I can call them my children, I'd win the "mother who had the most children" award this year. And yet, I stop and reflect on the things I've created in 2012 and the following are my favorites because they're the catalyst to stretching my creativity and passion for crafting to the next level.
 
Flower Pillow
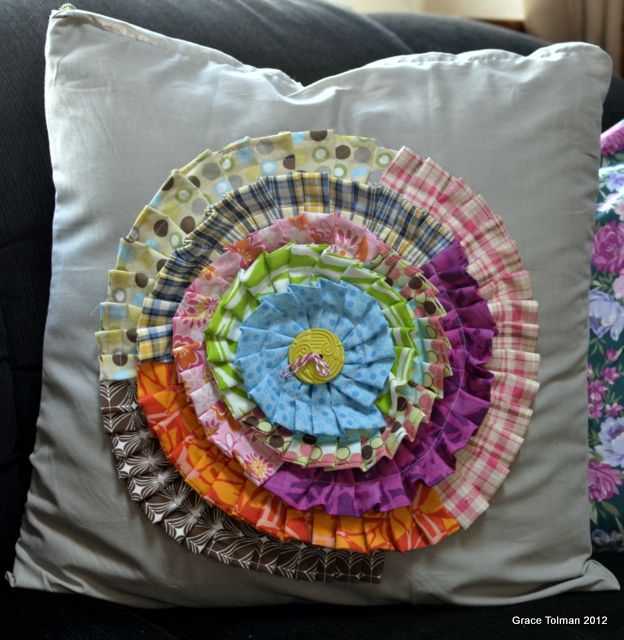
I made this project for a design team assignment. I remembered browsing through my pinterest boards looking for a project that I've always wanted to try but never had the time nor "guts" to follow through. I love finding pretty things to create for my home and this one definitely fit the bill. Plus using my scap fabrics to create my colorful pinwheel flower helped me to pair down my ever growing stash.

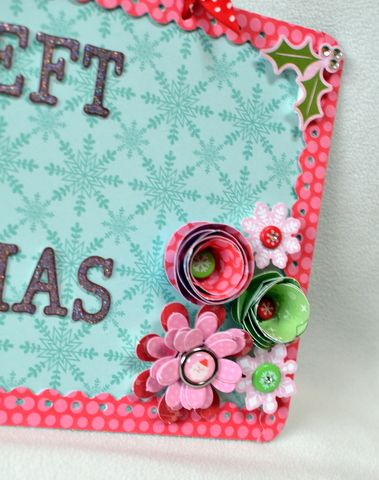
You've always had it in you card
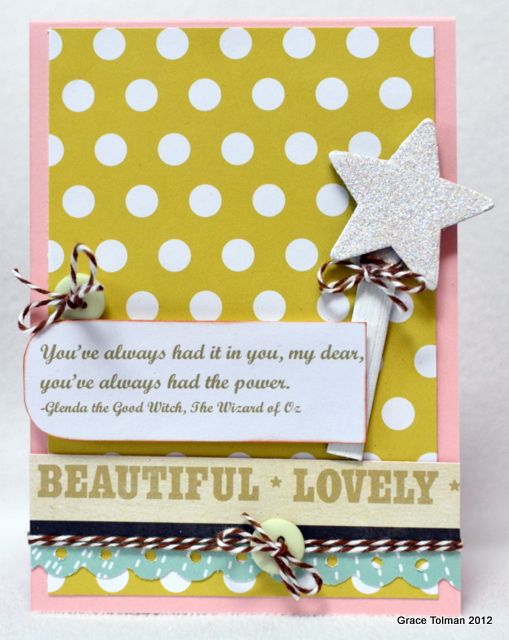
I made this card for a publication call. I was trying to make my style fit the publication needs. Unfortunately it was not picked up but I still adore this card. The journey I took in making this card was not my usual route. For most of my cards, I usually just "play" with whatever products I have on hand. With this one however, I planned out the papers, the chipboard and down to the quote. I can honestly say that this is not a typical "grace" card but I love how with just a little bit of planning, I'm able to put together a card that I had envisioned in my head.
 
Heart Healthy Altered Journal
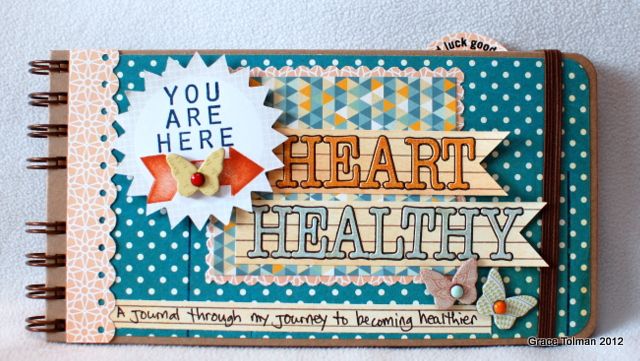
This altered mini was another one from the "assignment" project category. I made this earlier this year for Ella Publishing as they celebrated Heart Healthy Month. This book is one of my favorite projects of 2012 because of how practical this can be for my own life. I'm in the process of re-evaluating my lifestyle and how good health fits in the picture. This year I've been so consumed with other things that I've neglected to pay close attention to my weight and exercise. I love the fact that I've made projects like these that will come in handy in other aspects of my life.
 
 
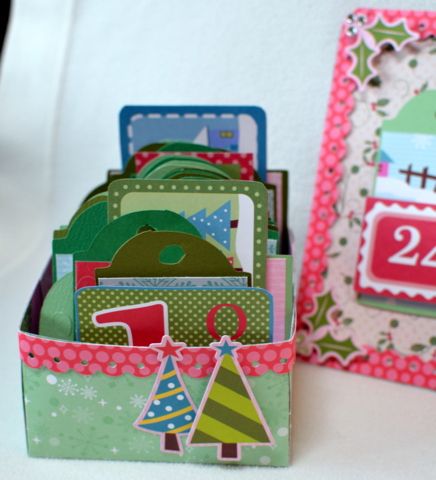
Be My Valentine Banner
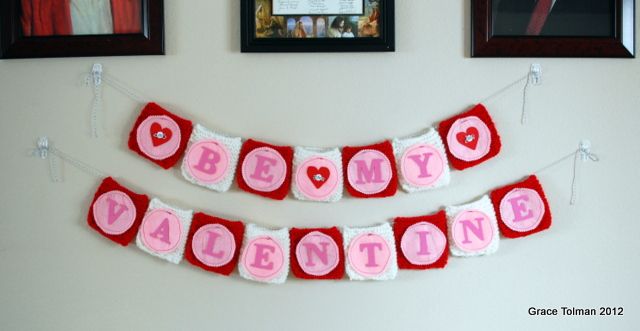
This is my favorite banner this year. The knitted pockets was intentionally made for Christmas but I was not able to finish it on time. So I turned around a negative into a positive and used the pockets to make a Valentine banner instead. With a few additions of the pink, I was ready to celebrate the "heart" holiday.
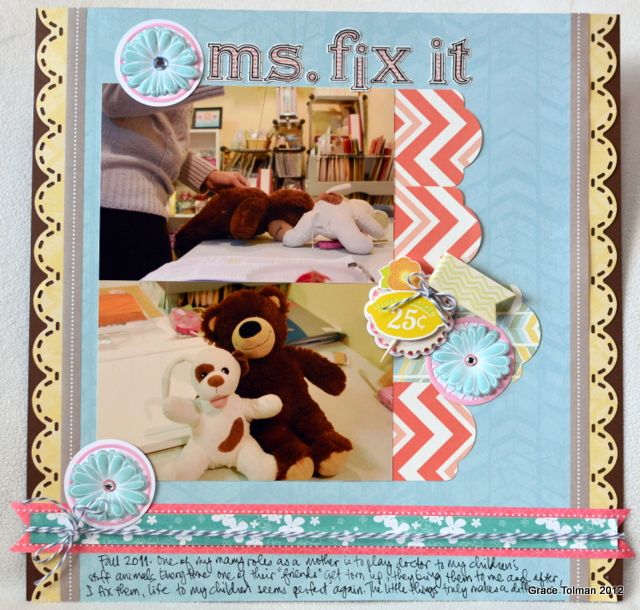
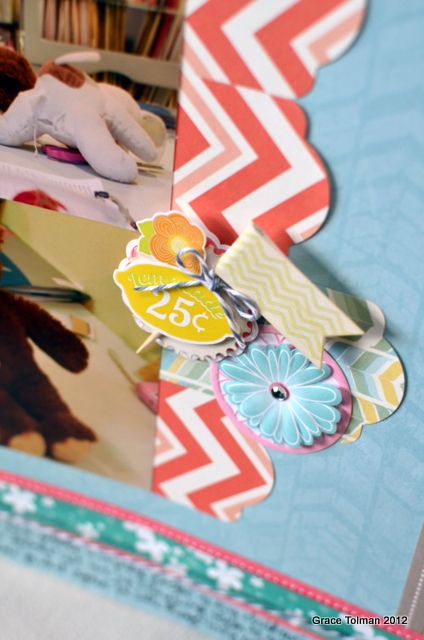
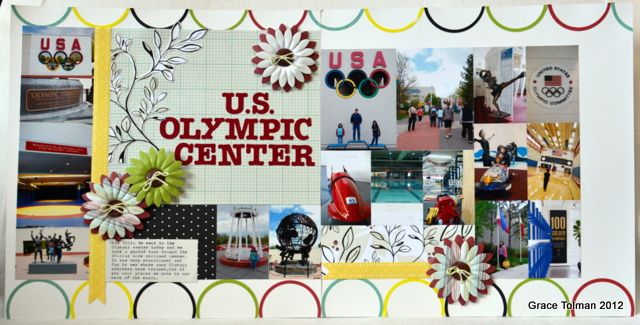
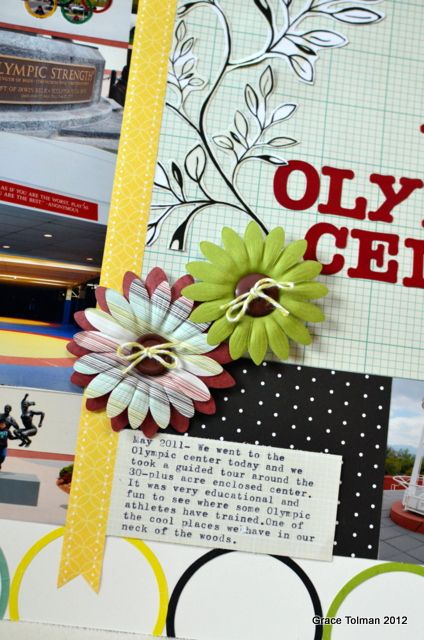
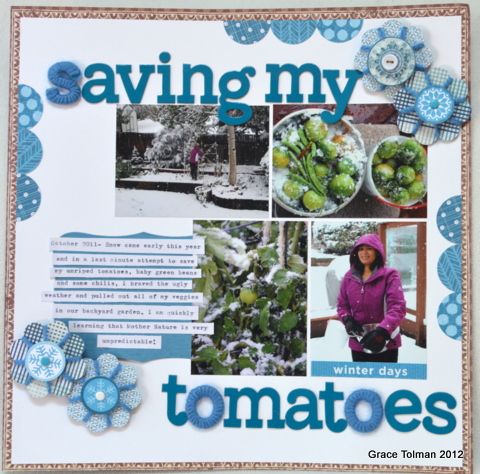
Curly Style layout

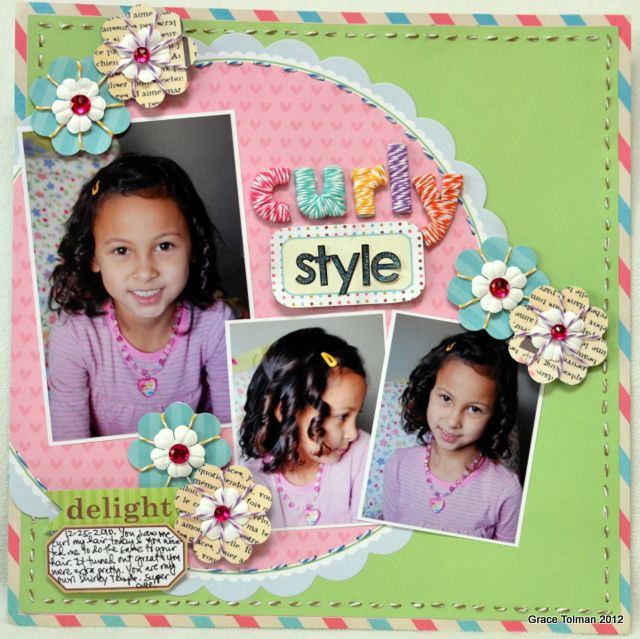
This is my favorite layout of the year. Again I reserve a special spot in my heart for ALL of my scrapbook pages but this one stood out because I tried to find all the techniques I can do with twine. I don't consider myself a "technique" person but this layout proves to me that I can get out of my comfort zone once in a while and like the results.
 
So there you have it. My favorites from this year. What about you? What project stood out to you that I've shared this year? What was YOUR favorite project that you made this year? I'd like to hear your thoughts.
 
See you next year. *wink*
 
Till next time,
Grace


Wednesday, December 26, 2012

What a year it was

Hi there. Hope you all had a great Christmas. Now that the gifts are opened and the parties are done, it's time to look forward to the new year. After all we only have a handful of days left in 2012. But before I plan my goals and make up my map for the coming year, let me quickly reflect on this year's events for each one in my family.
 
1. Hubby had a very challenging year this year. He's risen up to unexpected trials and I am very inspired by his courage and determination.
2. He hula hooped at a school function. In the 10 years I've been married to him, he still surprises me as to the things he'll try to attempt.
3. Went back to school this year. He's maintained a perfect attendace record and held a 4.0 GPA up to this point. And everyone thought I was the scholar in the family!
4. He impessed me at how good he was at putting together puzzles. We worked on one earlier in the year and it took him about three days to finish it all. If he has more time, I'm sure he'll get into more puzzles if he can.
5. Took the family in our first camping trip since we've moved to Colorado. He was our outdoor guide and he made everything comfortable yet full of adventures during our family camping trip. I know that the kids and I can survive the "wilderness" if Mitch is with us.
 

1. Took on a few more challenges this year such as a growing Photography business and becoming a college student again. I feel so blessed to be given such great opportunities and I'm grateful for a family that supports me through it all.
2. I was 75% successful in my Project 365 photo challenge this year. I was doing good, taking a picture every single day, up to about October. That's when I had lost the motivation and my brain wasn't in it anymore. I jumped back in December but for most of November, I wasn't taking pictures. :(
3. Upgraded to a better camera this year and I'm loving it! Plus the video capability is making wonders for the way I document our lives now. Snippets of our lives are being captured in moving film. How cool is that?!
4. I wrote my first online article for photography for Ella Publishing. You can read it here.
5. I earned my Young Women Medallion this year. I didn't get my personal progress accomplished when I was young and getting this second chance was a true blessing.

1.Marcus had made some major strides this year, even with the diagnosis of ADHD in the beginning of the year. I'm so proud of his achievements.
2. Wore prescription glasses for a whole 7 days. I am not pushing it anymore but I do wished he's try it again.
3. Is still very addicted to video games. Later in the year he was given the Skylander's game by his big sister and that's all he talks about. That boy sure loves his WII games.
4. Participated in his first Science Fair this year. It was mostly mom that was stressing over it but I'm proud of his efforts.
5. He's getting more and more opinonated about what he wears. I found it exciting to see him pick and choose what he wears for the day plus the reasoning behind it. Sometimes I don't get it but I love that he's thinking for himself.

1. Madelyn is enjoying first grade a ton! She is doing well with her school work and usually needs help with her homework. I love her enthusiasm with school and we feel blessed that she has a great teacher this year. It truly makes a difference.
2. Oh boy, this girl is turning out to be a big diva! She has an opinion about everything. From her clothes to shoes to even what she'd like to be put on her hair. Gone are the days that I can pick her outfits for her and she'll just put them on. Now it's a fight every morning because she wants to have the final say as to what she'll wear. geessshh!
3. I enjoy watching her make and keep friends. She has an official "bff" (best friends forever) and always comes home with tons of stories about friends and classmates. She is friends with everyone and I love that about her. I hope she continues to make everyone her friend and to find the great qualities in every person.
4. She learned to ride her bike this year. With a handful of falls under her belt, I can safely say that she's a bike-riding pro now!
5. Have really embraced the crafts that mom does. She learned how to knit this year and continues to play with mom's scraps and scrapbook leftovers. She's made multiple cards for friends and family and enjoy the crafting time.Dare I say "mini me"?

Thank you for taking a trip back through memory lane with me.

Till next time,
Grace

Monday, December 24, 2012

We Wish you a Merry Christmas

Hello there dear blog friends. One more day before Christmas. Can you believe it? I hope that you found some peace and joy during this holiday season amidst the hustle and bustle that we usually experience during this time of the year. Before I go and enjoy the beauty of the season with the family, let me share with you two videos that I really liked that talked about the true meaning of the holidays. The music in the first one is impeccable and the story of the other one will give you some "warm and fuzzy" feelings. Heck, it might even leave you with some tears! I invited my kids to watch the last one and they really liked the story too.


And here's our official Christmas card this year. I went digital for the first time and designed our greeting in Photoshop. One of my goals this season was to simplify and so for the first time I didn't make handmade Christmas cards. It was hard to let that go but after having the first holiday season in many years that I wasn't lacking sleep and feeling over spent, I have to say that this new method is making me feel very liberated. What do you think?
 
 
We wish you a very Merry Christmas.

Till next time,
Grace

Friday, December 21, 2012

Shows I got hooked on

Hi friends. Today I'm breaking up the crafty projects with a little bit of random,and sort of trivial kind of post. I'm thinking ahead for a future scrapbook page in my "me" album as well.
 
Anyways, my way of catching up with TV and shows have changed dramatically this year. Since we've gone away with cable and Netflix, most of my watching is either done through Hulu or by borrowing DVD sets from the Library. I have to say, I'm liking this kind of entertainment as I can easily screen all the advertisements (still get some through Hulu, but they're manageable) and I can watch a complete series in a few days. I also like the convenience of being able to watch while I craft in my "cave" when everyone's gone to bed. It's part of my "me" time and I enjoy it tremendously.
 
Some of my favorites this year was...
 
I was a huge fan of American Idol up to about four years ago. After that, I stopped watching any of the singing competitions until this year when I tried one episode of The Voice and instantly got hooked. I like the idea of the people being judge first and foremost by their voice. I'm still catching up (just on the beginning of the live shows) so please don't tell me who wins or in the top four or anything like that. Don't spoil the cliffhangers for me. :)

I started watching this when I borrowed the first season DVD at the Library. After that I decided to do a quick search in Hulu and found it in the "free watch" section. Woohoo! I'm inspired by the outfits and the fashion. Although I think it's totally unreal for her to really live the two lives in the real world but it still makes for a good story line.

I started watching this when we still had Netflix. I was bummed when I didn't even get to finish the first season but thankfully my local library had the other seasons on DVD and all I had to do was wait patiently for my turn to get it. I think I had the second and third season on hold for about a month till I was able to finally get it. The wait was worth it though cause I am inlove with Jane Bingham and her super sassy character!

And finally for this year, I've heard so many good things about this mini series from my sister Glady but I didn't have the time to see it for myself until about a week ago. I love the concept and being a Jane Austen fan, I love the script. There's already a few lines that I'm replaying in my head over and over again. This is a bit more dramatic and have more shocking plots that my fave Jane Austen Novels but I still love the glimpse of the early 1900's. It's so formal, proper and way different than our times. Oh how I love that time period!
 
So there you have it. My show picks of the year. I'm always looking for a new show to get hooked on, any suggestions?
 
Till next time,
Grace


Wednesday, December 19, 2012

Layout share *Creative Memories*

Hello there. Today's going to be a busy one for me as I attend both kid's Christmas parties and find time to work on unfinished projects. But before I head off to my busy day, let me share with you some layouts I made recently.
 
Ms. Fix It
I used the Summer Additions papers from Creative Memories here. I love the soft blue and the diagonal design. The geometric shapes are the trend these days. I used two of my favorite Creative Memories punches and that is the tag punch and the Scallop border punch. Love, love, love them!
 
This page is about one of my roles in this household and that is...a doctor to my kids' stuff animals. Every time there's a rip or tear to any of their beloved toys, they know immediately to put them on my craft table so I can sew them up as soon as I have the chance. I love it that to my kids' eyes, I'm "mrs. fix it!"

I love layering embellishments. In this page, I added a flag, stickers and die cut shapes to a cluster of embellishments.

US Olypmic Center
This page seemed to have been long overdue to complete. These pictures are almost two years ago. Sometimes I fret about being behind and other times, I don't really care about it. For some reason, this story seemed to be a very important one to document that when I had finally scrapbooked it, it made me feel productive.

One of the neat places to visit in my new hometown is the US Olympic Center. There's just a few in the country and Colorado Springs happen to house one of them. We got to tour the place and learned a few things about what athletes do/train for so they can proudly represent our country in the Olympics.

I used the Creative Memories circle cutter to cut the circles in my top and bottom border of the page. These circles reminds me of the Olympic Logo. I used the Enchanted line in this page.

To learn more about these and other Creative Memories products, click here.

Thank you for stopping by.

Till next time,
Grace


Monday, December 17, 2012

Infinite Power of Hope

It saddens me to start my week with a post like this but I think I must add my thoughts and feelings to the very tragic events that took place last Friday in Newtown, Connecticut. It breaks my heart to know that little kids' lives were cut short because of decisions made by one person. This horrific news made me loose some of the hope I had in humanity. But alas, we know that the Lord is above all things. We might never find the asnwers to the many "why's" we have about this event but this I know....He has a plan for each and everyone of us.
 
I share with you my testimony that through these coming days of despair, sadness and uncertainty, let us turn to the One that will give us hope, comfort and peace. There is strength in the knowledge of the infinite power of hope we can only achieve through our Savior, Jesus Christ.
 
If you have some time, please watch this quick 2 minute video.
 
May we all find comfort and peace during these hard times.
 
Till next time,
Grace

Friday, December 14, 2012

Take Twelve, December Edition

Wow, it's Friday already! I'm counting the days till it's officially winter break. Oh, I can't wait for the laid back schedule and sleeping in. Can you tell I've been a little busy lately that I'm craving the break?

Anyways Wednesday was the infamous 12-12-12 and we survived it! So I guess the Mayan's are incorrect with their prediction. The world hasn't ended yet and that gives me hope. :) Speaking of the 12th, did you participate in our last Take Twelve challenge of the year? I hope so.  I've considered this challenge to be a precious one to participate in. I've totally sucked with my Project 365 photo project so having 12 images to document my month was a great consolation. It made me feel that I've accomplished a ton and I didn't fail in my photo documentation this year. Oh so good! Thank you Ella Publishing for giving us, memory lovers a non stressful way to document our everyday moments. 


Ok so let's get on to what I did on the 12th of December...
So of course I had totally forgotten to bring out my camera in the beginning of the day so these photos didn't start till lunchtime...

1. Hubby cut into a freshly made batch of Maple Walnut Fudge. I love his perfect squares. We make a great pair of fudge making people. I do the making and he does the cutting. If you've made fudge before you know how hard it gets when it's ready to cut into and I love how my hubby's arm muscles do the work.:)
2. Our family's excited about the new Hobbit movie that we prepurchased our tickets already.
3. Oh my dear daughter never makes her bed in the morning. Sometimes I worry that I'll have a neat freak guy and a slob teenage girl in the home.
4. Taking photos of latest projects finished.
5. Worked on some pictures in photoshop for a client.
6. Did a work out. I'm committed to loose some or at least maintain before the Christmas break so I have some wiggle room to enjoy all the Holiday food and celebrations. :)
7. Searching a recipe for a good Chicken Tortilla Soup for dinner tonight. We have some leftover chicken plus it's been cold lately that it's a perfect night for soup.
8. Found an easy recipe that I didn't have to go out the store and purchase any last minute ingredients. Oh btw, here's the recipe I used. Yummy!
9. Went to Cub Scout Pack meeting tonight.
10. Packed the kids' lunch for the following day.
11. I did some knitting while waiting for the kids to get ready for bed.
12. I helped my husband review some of his Medical spelling words for his test yesterday.

So that's it. I hope you enjoyed looking through my life with this challenge and I hope you consider challenging yourself once a month to document your everyday. I'm telling you that it's a very special way of preserving yours and your family's memories.

Till next time,
Grace

Thursday, December 13, 2012

Big Picture Classes and Ella Publishing GIVEAWAYS + photo

Hi there. Today is exactly 12 days before Christmas, can you believe it? I can't and I still have a zillion things to do. Aacckk!
 
Ok so before I continue my panic attack, I'm here today to share with you my recent blog post contribution to the Ella Publishing blog.
 
We were asked to share a photo and I chose to focus on one of my favorite gifts I received this year. To read more of why I chose this piano as my main subject, click here.
 
And because it's the season for gift giving, I am thrilled that I can share with three of my blog readers a sit in one of these classes and a copy of the latest ebook from Ella Publishing....
 
In Artful Parenting—The Transitional Tween Years, Karen Stockham, a licensed family counselor, will help you explore ways to maneuver these inevitable, game-changing years while maintaining emotional closeness to your 9- to 12-year-old.
 
In this four-week workshop, you'll learn to create mixed-media wall art, collaged frames, and dimensional decor to bless your home with your own unique touch. Along the way, you'll discover meaningful ways to bring blessing into your everyday and then create tangible elements to reflect these blessings.
 
Becky Higgins' Project Life system, which is built around the idea of scrapbooking quickly inside divided page protectors, has revolutionized the way thousands of people approach memory keeping.
We're thrilled to unveil the first eBook to dive deep into the Project Life system, revealing seven amazing strategies that could revolutionize the way you approach Project Life!
This is your chance to join seven avid scrapbookers as they get inspired by their own recent scrapbook pages and then "dig deep" to tell seven types of expanded stories within their ongoing Project Life albums.

Now here's your chance....
1. Comment on this post and tell me which one you'll want to win (you can comment for each for more chances of winning but you can only win one)
2. For an extra chance, follow my blog by adding yourself in my Google friend connect (on the right side of this blog)
3. Like Ella Publishing on Facebook.

Giveaway ends on Dec. 20th (a whole week from today) midnight, Mountain time. I'll announce the winner soon after that.

thank you for stopping by.

Till next time,
Grace

Wednesday, December 12, 2012

Christmas Countdown Project

Hi there. My kids l-o-v-e counting down the days till it's Christmas. I've gotten into the spirit of the activity as well by having at least three of these countdown decorations at home. I know it's a bit too much but we just love the excitment and anticipation, these kinds of projects/decorations bring. Here's the latest one I've made for the kiddos...
 
Christmas Countdown Wall Decor

Size: 14 ½ x 15” (countdown décor) 4x 3” (tags) 4x4x2 ½” (box)


Supplies Used:
Cast Acrylic- Clear Scraps; Cardstock- (Crème de Menthe; Keylime Pie; Olive Oil) Cutmates, WorldWin; Pattern papers- Winter Wonderland, My Little Shoebox; Stickers- Winter Wonderland, My Little Shoebox; Die cut flowers- Winter Wonderland, My Little Shoebox; Letter stickers- Whoopie Pies, Sprinkle Glaze Alphabet sticker, My Little Shoebox; Bards- (small green) Funfetti, Glitter Brads, We R Memory Keepers, (others) Happy Holidays Assortment, Boutique Brads, Doodlebug Design Inc.; Twine-Maraschino, The Twinery; Ribbon- Michael’s Craft Store; Border punch- Fiskars; Bling- Pastel Gems, EK Success; Die cut machine- Cricut, Provo Craft; Cartridge- Sweet Treats; Adhesives- Mini Square, Extreme tac, U cut it foam, Perma Tac- Glue Arts


Cricut Cuts sizes:
(cupcake4)(tags)- @4” x 25

Notes:
Making the tags in the Cricut eliminated what would’ve been more work in creating this project.


Instructions: Measure your cast acrylic and cut pieces of paper that fits the block. Adhere these pieces of papers on the back side of the acrylic, adding the adhesive ONLY on the edges. Punch a decorative border on four strips of red dot paper. Adhere to the edges of the card on the TOP of the cast acrylic. Cut a piece of green strip paper that is about 6 x ½” in size. Cut the top and bottom corners into notches and adhere to the top of the acrylic, covering the edges of the two pattern papers. Wrap the twine twice around the green stripe paper and tie the ends into a ribbon. Create the die cut flowers, add brads and then adhere to the bottom right edge of the project. Add three more corner stickers to the project . Add rhinestones to the corner stickers and some of the brads of the flower accents. Add the glittered letter stickers.  To make the tags- Using the die cut machine, cut 25 pieces of tags from three different hues of green cardstocks. Cut pieces of pattern paper to cover the front part of the tag. Cut out the numbers from paper and then adhere them to the tags using foam adhesive.  To make the box- Cut a piece of pattern paper that is 9 inch square. Score the piece to create a 4” square with a 2 ¼” height. Add a punched border red dot paper on the top edge. Add some tree stickers and then fill the box with the rest of the tags. Notes: I used a cast acrylic piece as a foundation for this countdown calendar. I was also inspired by a pattern paper piece that had number blocks 1-25 to create this countdown calendar. Because the cast acrylic is harder than the normal acrylics, I had my husband drill the hole where I placed my brad for my tags to hang onto.  I made a box to store the rest of the tags from paper. This will make replacing the number tags easy during the Holiday season.


Happy Holidays :)

Oh BTW, don't forget to do Ella Publishing's Take Twelve challenge today. *wink*

Till next time,
Grace


Tuesday, December 11, 2012

CK Jan/Feb 2013 issue

Hello my dear blog friends. Today I'm super excited to share with you that the Creating Keepsakes Jan/Feb 2013 issue hits newstands TODAY! I was very honored to have a project in this issue.
 

Saving My Tomatoes
As seen in the Jan/Feb 2013 issue of Creating Keepsakes magazine. Copyright Creative Crafts Group. Posted with prior permission from the publisher.
 
Here's a few places where you can get more info about this fantastic issue...
· The Sneak Peek: http://www.creatingkeepsakes.com/articles/January_February_2013_Sneak_Peek
 
I hope you check it out cause Creating Keepsakes always put out great and informative issues. Even I got a few pages dog-eared so I can try some new technique and ideas.
 
Happy Tuesday.
 
Till next time,
Grace


Monday, December 10, 2012

Holiday cards

Happy Monday friends! I'd like to start of the week with some cards share. And because we are in the Holiday season, I picked the ones that are applicable for this time of the year...
 
Happy Holidays
Size: 4 1/8” x 4 1/8”

Supplies Used:
Pattern paper-Winter Wonderland, My Little Shoebox; Stickers- (epoxy) Holidazzle, Creative Memories; (tree) Winter Wonderland, My Little Shoebox; Stamps- Bows and Holly, Lawn Fawn; Ink- (black) Jet Black, Stazon, Tsukineko; (red) Cherry, American Crafts; (raspberry) Versacolor, Tsukineko; Pen- Black, Dual-tip, Creative Memories; Scallop Scissor- Fiskars; Dies- Classic Scallop circles large, Spellbinders; Adhesives- Perma tac, u cut it foam, Raisen’s, Mini Square- Glue Arts; Flower- Pink, Accent Creative Designs

Instructions: Fold your pink pattern paper into a card sizing about 4 ½” square. Run it through the die cut machine using the circle scallop circle die. Cut another piece of scallop circle paper using the grey pink dot paper. Emboss the edge as well. Ink the edges of the pink/grey dot paper and adhere to the circle card. Cut a piece of green snowflake paper that is about 1 ½” in width and 5” in length. Cut the edges with scallop scissor. Place another pattern paper on top of the border. Adhere the layered border piece on the bottom portion of the card, cutting the left and right edges into notches. Stamp the gift box and tag images onto pattern paper. Set it aside to dry. Wrap the twine around the bottom paper strip twice. Secure the ends on the back side of the card. Adhere the Christmas tree sticker and flower onto the card. Cut the gift box and tag accent and adhere to the card. Place the epoxy stickers on the sticker and stamped images.
Notes: I used a die cut machine to make my shaped card. I place the die a little above the top of the fold of the paper so I won’t cut the fold of the card. I mainly used a pink color scheme on this card but with the tree, snowflake and gift box accent still keeps the Christmas/Holiday theme in the card
 
Joy to the World
Size: 4 x 5”

Supplies Used:
Cardstock- (red and white) WorldWin; Pattern papers- Holiday Style, October Afternoon; Buttons- Traditions, Fancy Pants Designs; Ribbon- Red, Offray; Stamp- Holiday Expressions, Inkadinkado; Ink- Jet black, Stazon, Tsukineko; Adhesives- Perma tac, Mini Square- Glue Arts

Instructions:
1.Stamp the image onto white cardstock using black ink. 2. Make the card base using red cardstock 3. Cut a piece of the holly leaves paper that is ¼” smaller than the card base and adhere to the center of the card. 4. Cut a ¾” strip of striped paper and adhere to the bottom of the card. 5. Wrap the red ribbon on top of the striped paper and adhere the ends. 6. Make a bow with the red ribbon and adhere to the center of the ribbon strip. Add a tiny green button in the center of the bow. 7. Cut out the Santa image to a 3 ½” x 2 ½” block. Mat with black/beige dot paper and adhere to the center of the card. 8. Add two green tiny buttons on the top corners of the block.

Happy Winter

Size: 4 ¼” x 6”

Supplies Used:
Cardstock- White, WorldWin; Pattern paper and stickers- Year-o-graphy, Simple Stories; Bling- Creative Charms; Adhesives- U cut it foam, Perma tac- Glue Arts

Notes:
This card was made super easy with coordinated products

Instructions:
Trim pattern paper 1/8” smaller than the card base and adhere. Place a striped sticker on the bottom right side of the card. Place the letter stickers above it to spell out “Happy Winter”. Place a snowflake sticker on top of the snowflake design on the paper using foam adhesive. Place rhinestone on three different spots of the card to create a visual triangle.

Snow card

Size: 4 ¼” x 5 ½”

Supplies Used:
Cardstock- WorldWin; Pattern papers, chipboard, Stickers- Twig, Little Yellow Bicycle; Button- Fancy Pants Design; Paper Trimmer with Decorative blade- Creative Memories; Adhesives- High Tac, Mini Squares, U cut it foam, Raisen’s- Glue Arts

Notes:
I love adding embellishments with dimensional adhesive to give the project texture and layers.

Instructions:
Make the card base with cardstock. Cut a piece of blue dot paper that is 1/8” smaller than the card base. Cut this piece using a decorative blade attachment to a paper trimmer. Cut a piece of brown snowflake paper that is 4” x 5 ¼” in size. Measure ½” all round the snowflake paper, make measurement lines on the back side of the paper and cut out a frame.  Adhere to the card. Place the chipboard snowman, chipboard snowflake and sentiment accents on the card using dimensional adhesive. Add a small blue button in the center of the chipboard snowflake using mini square adhesive. Notes: I cut the brown snowflake paper into a frame so I won’t lose any of the beautiful design of the blue dot paper in the background.


I hope you all have a great start to your week.

Till next time,
Grace

P.S Does this new format of sharing my cards with supplies and instructions better for you? Let me know so I can start doing it like this from here on out.  :)

Thursday, December 6, 2012

Christmas Quote

I heard a great devotional on Sunday that gave me a great start for the season. The big thing that I got out of it is that during this season I shouldn't 'get stressed out, wrung out or worn out!". If you want to hear more about this great talk, you can watch it here

And because I do want to live this "stress-free" holiday season mantra in my life today, I'm leaving you with this quote. 

Thanks for stopping by. 

Till next time,
Grace


Wednesday, December 5, 2012

Diaper cake tutorial

Happy Wednesday everyone. Do you have a go-to gift for baby showers? I've done many things before, especially ones that I can incorporate my creativity with but I have to say that my "comfort zone" gift would have to be a diaper cake! It's practical and an easy gift to put together. I can do this while watching a good movie or show. 


I recently made one for a baby shower that my family and I attended and since I was making it, I decided to take pictures of the process to share my tutorial with my blog friends. Hope this will help someone that's looking for that unique gift.

1. First off all, you gather your supplies. You'll need:
a pack of diaper (for a three tier cake, you'll need at least 36 1-2 size diapers)
Cardboard or cake round
doily
1 1/2 yards of tulle (you can designate the color for the sex of the baby. ie pink for girl, blue for boy)
2-3" ribbon
baby toy
clear tape
pin
scissor
curling ribbon

2. You can use a cake round but if you're cheap (or like me have tons of cardboard already on hand) you can trace a round shape on the cardboard, cut it out and then add the doily on top. 

3. Open up a diaper and roll it. Secure it with tape. Do this for about 20-24 pieces of diaper. 


4. After you've rolled about 24 of them, you can wrap this bundle with curling ribbon. Form it into a round. 

5. Repeat step 3 and 4 for the other two smaller tiers. *you will be the one to pick the number of diapers in each tier. For this cake, I had 50 diapers and so I made the largest round with 24, the middle had 15 and the top one has 11.

6. Next wrap ribbon around the cake rounds to cover the curling ribbon. Fold the end and pin to secure. 


7. Wrap the whole cake with tulle. Gather the ends on the top and tie the ends with more curling ribbon. Make the ribbon longer so you can tie the toy with it. Trim the extra tulle on the top of the diaper cake. 


8. Wrap more ribbon on the top of the cake and tie the ends into a bow. Add the toy. 

And now your diaper cake is ready to give. Just make sure that you're careful when transporting this gift as the tiers are not adhered to each other and they can easily move around. 

Thanks for stopping by.

Till next time,
Grace

Tuesday, December 4, 2012

Air and Space Museum at the Peterson Air Force Base

Hello there. So about two weekends ago we were invited to a baby shower/house warming party by one of Mitch's classmates. This lady and her family just moved into a house in the Peterson Air Force base. We figured that since she's already going to need to escort us inside the base, that we will take that opportunity to come visit the Air and Space Museum that they had over there. It's free to tour the museum and that's always a great thing *wink*.

Here are some of the photos from our little excursion to the museum....

They have a little building with artifacts and of course a gift shop but most of the displays are outside since it's mostly airplanes.

We came to the museum an hour before they were going to close so we didn't get to see the displays in the "hanger" but we did get to go inside this airplane which was a radar aircraft and the tour was amazing.


a look at the inside of the aircraft...


this plane is pretty old so we were asked not to touch anything. Of course that was very hard for my tactile kids but the tour guide was pretty good at trying to keep them interested in what he's talking about. 

we even got the see the cockpit. I didn't know this but in airplanes, pilots are on the right and in helicopters, pilots are in the left. There's always something new I learn everyday. 

and here are some more things we saw on display...

the family with the radar aircraft in the background. 

Mitch's classmate was so generous, she even bought the kids a small plane as a souvenir. Here's Maddie showing it off underneath one of the aircrafts. 


Have you ever been inches away from the front of an airplane? I have not so I had to take this photo, just for fun!

Thanks for stopping by. Hope you have a great Tuesday. 

Till next time,
Grace